Mastering the Art of Jewellery Soldering: A Beginner’s Guide to Joining Precious Metals
Related Articles: Mastering the Art of Jewellery Soldering: A Beginner’s Guide to Joining Precious Metals
Introduction
In this auspicious occasion, we are delighted to delve into the intriguing topic related to Mastering the Art of Jewellery Soldering: A Beginner’s Guide to Joining Precious Metals. Let’s weave interesting information and offer fresh perspectives to the readers.
Table of Content
Mastering the Art of Jewellery Soldering: A Beginner’s Guide to Joining Precious Metals
/153083523-F-56a03f4d3df78cafdaa0aa21.jpg)
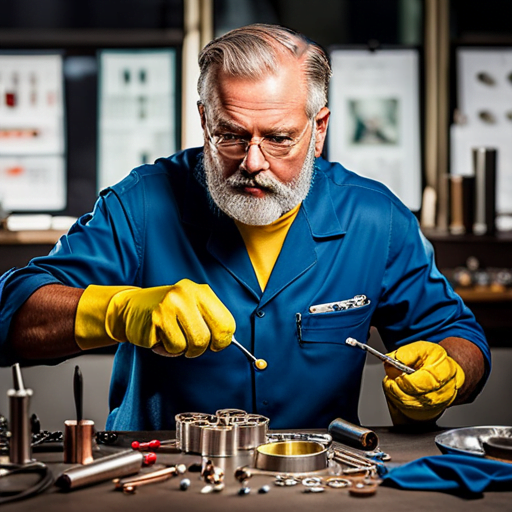
Jewellery soldering is a fundamental skill for any aspiring metalsmith. It allows for the permanent joining of precious metals, enabling the creation of intricate designs and functional pieces. While it may seem daunting at first, with the right knowledge and practice, anyone can master this essential technique. This comprehensive guide will provide beginners with a clear understanding of jewellery soldering, from its basics to advanced techniques, ensuring a smooth and successful journey into the world of metalworking.
Understanding the Basics of Jewellery Soldering
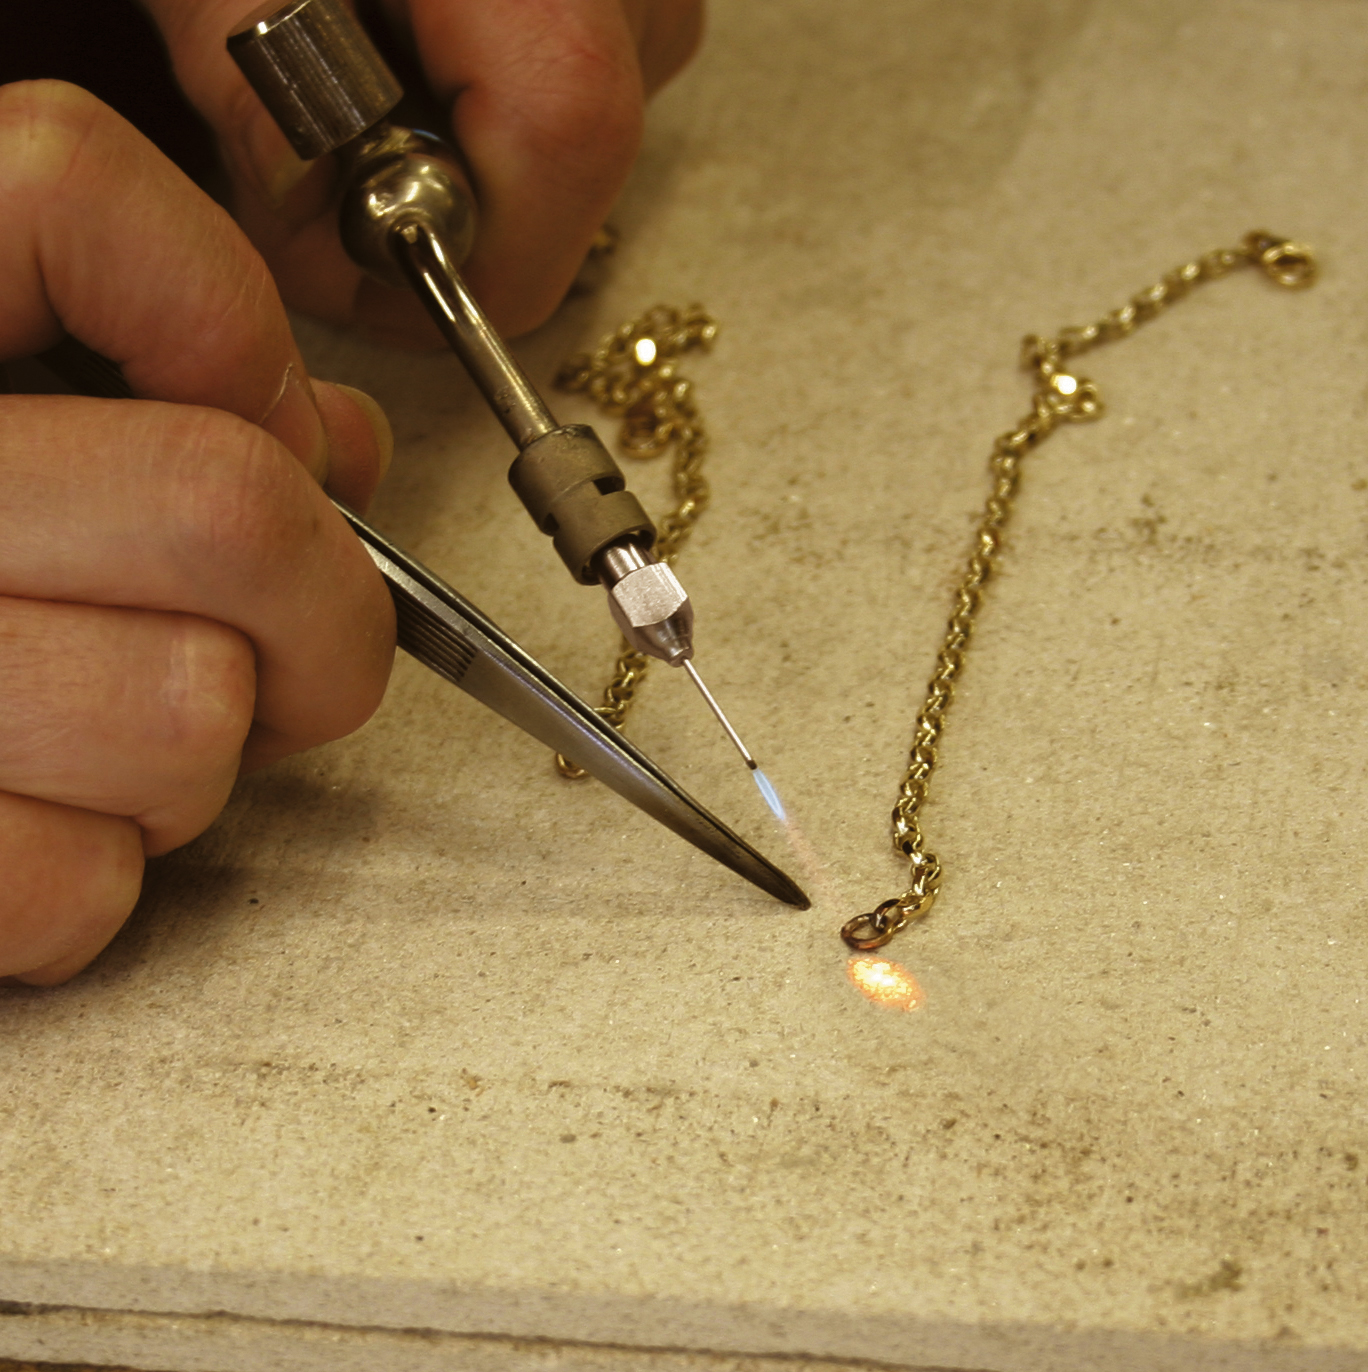
Jewellery soldering involves using a specialized alloy, known as solder, to join two or more pieces of metal. The solder has a lower melting point than the metals being joined, allowing it to flow freely between the surfaces and solidify, creating a strong bond. This process requires a controlled heat source, typically a torch, and a flux, which cleans the metal surfaces and prevents oxidation.
Types of Solder and Their Applications
Solder alloys are classified based on their melting points and compositions, each suited for specific applications:
- Easy Solder: This type melts at a relatively low temperature and is ideal for delicate work, such as filigree or small components.
- Medium Solder: This solder offers a balance of strength and ease of use, making it suitable for general jewellery making.
- Hard Solder: This type melts at a higher temperature and provides greater strength, often used for structural components or pieces that will experience significant wear.
Essential Equipment for Jewellery Soldering
Before embarking on your soldering journey, it’s essential to gather the necessary equipment:
- Torch: A propane torch is a common choice for beginners due to its affordability and ease of use.
- Soldering Station: This provides a stable platform for working and incorporates a built-in air pump for controlled flame adjustments.
- Flux: This comes in liquid or paste form and is crucial for removing oxides and facilitating solder flow.
- Solder: Choose the appropriate solder type based on the metals you’re working with and the desired strength.
- Pickling Solution: This removes oxidation and residue from soldered pieces, leaving a clean finish.
- Safety Glasses: Protect your eyes from potential hazards like sparks and fumes.
- Gloves: Protect your hands from heat and chemicals.
- Tongs: Used to manipulate pieces during the soldering process.
- Third Hand: This tool holds and stabilizes pieces while soldering, allowing for precision and control.
- Soldering Board: This provides a heat-resistant surface for soldering.
- Sandpaper: Used for cleaning and preparing metal surfaces for soldering.
Preparing for Jewellery Soldering
Before attempting to solder, it’s essential to properly prepare your workspace and materials:
- Cleanliness: Ensure your workspace is clean and free of debris.
- Safety: Wear safety glasses and gloves to protect yourself from potential hazards.
- Metal Preparation: Clean and polish the metal surfaces to be soldered using sandpaper or a polishing cloth.
- Flux Application: Apply flux to the surfaces to be joined, ensuring it’s evenly distributed.
The Soldering Process: Step-by-Step
Once your workspace and materials are prepared, follow these steps for successful soldering:
- Positioning: Securely hold the pieces to be joined using a third hand or tongs.
- Heating: Apply the torch flame to the joint area, focusing on the metal surfaces, not the solder.
- Solder Application: Once the metal surfaces are heated to the solder’s melting point, apply the solder to the joint.
- Flowing: The solder will flow into the joint, creating a strong bond.
- Cooling: Gradually reduce the heat and allow the soldered piece to cool completely.
- Pickling: Clean the soldered piece using a pickling solution to remove any flux residue and oxidation.
Common Mistakes and Troubleshooting
Jewellery soldering can present challenges for beginners. Here are some common mistakes and solutions:
- Insufficient Heat: If the metal surfaces aren’t heated sufficiently, the solder won’t flow properly, resulting in a weak joint. Increase the torch flame and focus on heating the metal surfaces.
- Excess Flux: Too much flux can prevent the solder from flowing properly. Ensure a thin, even layer of flux is applied.
- Cold Solder: This occurs when the solder solidifies before flowing into the joint, resulting in a weak bond. Ensure the metal surfaces are heated to the solder’s melting point.
- Uneven Heating: If the metal surfaces are not heated evenly, the solder may flow unevenly, creating a weak joint. Focus on heating the entire joint area evenly.
- Oxidation: Oxidation can prevent the solder from flowing properly. Use flux to remove oxides and ensure clean metal surfaces.
Advanced Soldering Techniques
As you gain experience, you can explore more advanced techniques:
- Hard Soldering: This technique requires higher temperatures and specialized hard solders, providing greater strength for structural components.
- Silver Solder: This type of solder is used for joining silver and its alloys, requiring specific temperatures and flux.
- Brazing: This process uses a high-temperature alloy, similar to solder, to join metals.
- Torch Soldering: This technique uses a specialized torch with a controlled flame for precise soldering.
- Microtorch Soldering: This technique uses a small, focused flame for soldering delicate pieces.
Tips for Success
- Practice: The key to mastering jewellery soldering is consistent practice. Start with simple projects and gradually increase the complexity.
- Patience: Soldering requires patience and attention to detail. Take your time and don’t rush the process.
- Experimentation: Try different types of solder, flux, and techniques to find what works best for you.
- Safety First: Always wear safety glasses and gloves when soldering.
- Seek Guidance: If you encounter difficulties, don’t hesitate to seek guidance from experienced metalsmiths or online resources.
FAQs About Jewellery Soldering
What type of solder should I use for jewellery?
The type of solder you use will depend on the metals you’re working with and the desired strength of the joint. For general jewellery making, medium solder is a good starting point.
What is flux and why is it necessary?
Flux is a chemical compound that cleans the metal surfaces and prevents oxidation, allowing the solder to flow freely.
How do I know if my metal is hot enough for soldering?
The metal surfaces should be heated to the solder’s melting point. You can test this by applying a small amount of solder to the metal. If the solder melts and flows, the metal is hot enough.
What should I do if my solder doesn’t flow properly?
Ensure the metal surfaces are clean and free of oxides, increase the torch flame, and focus on heating the metal surfaces evenly.
How do I clean my soldered piece?
Clean the soldered piece using a pickling solution to remove any flux residue and oxidation.
Conclusion
Jewellery soldering is a versatile and rewarding skill that opens up a world of creative possibilities for metalsmiths. By understanding the basics of soldering, practicing diligently, and embracing experimentation, beginners can confidently embark on their jewellery making journey. With dedication and a passion for the craft, anyone can master the art of joining precious metals and create stunning pieces of jewellery.

:max_bytes(150000):strip_icc()/GettyImages-96364335-5797829b3df78ceb865033aa.jpg)


Closure
Thus, we hope this article has provided valuable insights into Mastering the Art of Jewellery Soldering: A Beginner’s Guide to Joining Precious Metals. We appreciate your attention to our article. See you in our next article!